When you are finished with this article, you will be able to easily design your own offering envelopes in Publisher. Then you can either print them yourself on your desktop printer or submit your design to a print shop for printing.
- Step 1. Create the Envelope Template
- Step 2. Set Your Margins
- Step 3. Choose the Orientation of Your Envelope
- Step 4. Save Your Offering Envelope!
- Step 5. Position Guides
- Step 6. Import Your Church Logo
- Step 7. Add Text Boxes
- Step 8. Add Lines or Boxes
- Step 9. Align and Distribute Text and Objects
- Step 10. Check Your Work
- Step 11. Save Your Envelope Again!
- Step 12. Print Your Offering Envelopes
- Step 13. Tips
- Step 14. Free Offering Envelope Templates
Before you get started, we recommend that you take a look at our previous offering envelope article, Offering Envelopes: How to Design Your Own, in which we explain how to decide on the content of your offering envelope, and go over some design basics.
1. Create the Envelope Template
Open Publisher and select More Blank Page Sizes > Publication Types > Envelopes. Select the size envelope you would like to use. If you need an envelope size that is not listed, select Create New Page Size, and enter your own dimensions. A common envelope size used for offering envelopes is the 6 3/4 which measures 6.5″ x 3.625″.
2. Set Your Margins
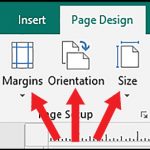
The default margins for a new document is 0.5”, which ends up wasting a lot of space. You can set the margins to whatever works best for your printer. Page Design > Page Setup > Margins > Custom Margins. A margin of .25″ on all sides will usually work for most printers.
3. Choose the Orientation of Your Envelope
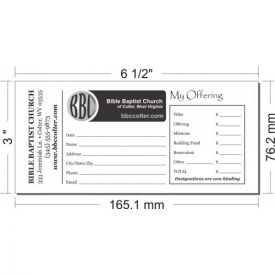
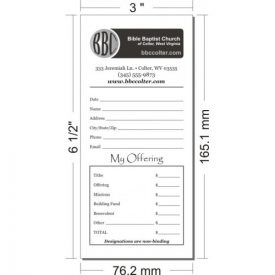
Some churches have offering envelopes with a vertical (portrait) design. This makes them easier to read while they are in the pew rack. The more common orientation for offering envelopes is horizontal (landscape). Decide what works best for you. Page Design > Page Setup > Orientation.
4. Save Your Offering Envelope!
Next, save your envelope. You don’t want to lose your design if something happens while you are working on it. Save it somewhere you will easily find it again. And save it often while you are making changes. The keyboard shortcut for save is Ctrl + s.
5. Position Guides
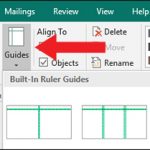
Guides will be helpful when lining up text and other elements on the page. Page Design > Layout > Guides. Or you can just click on the top or left ruler, and drag to position on the page. It is a good idea to position them to the center of the page both vertically and horizontally. Guides are easy to move, so if you end up changing your mind about where you want them, just click and drag to re position, or drag off the page to delete.
6. Import Your Church Logo
To add your logo or other images to your offering envelope Insert > Illustrations > Pictures. Once your image is on the page, drag the corner to resize, and place wherever you like.
When you start to add text near your image or logo, the text may shift around or be obscured by your image. To avoid this, change how your image interacts with text. Click Home > Arrange > Text wrap. Choose how you want text wrap around your logo, or choose None and it will not be affected by text at all. An alternative option for Home > Arrange > Send Back. This will make your image appear behind any text.
7. Add Text Boxes
Next, we will begin adding text to our envelope. Insert > Text > Draw Text Box, then drag to size, and place where you want the text to be. Fill in text boxes with your text, and format as you wish. Play around with fonts, color, and text size.
Text should be at least 8-9pt to be easily read. Choose a font that looks good, and is easy to read. There are also many preset style options for text. Select the text box you want to make the changes to, then Text Box Tools Format > WordArt Styles > Text Effects to see various options, such as shadow, reflect, and bevel. Generally, it is better to stick with something simple and eye appealing than to use some of the WordArt Styles that could effect readability when printed.
A few other options you should check out on the Format tab are the Alignment and Text Direction. There are so many options to make your offering envelope design stand out from the crowd.
8. Add Lines or Boxes
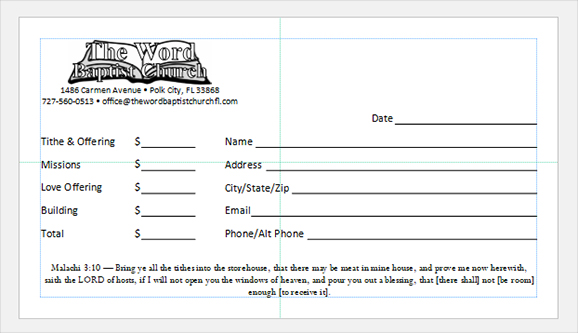
You can add lines or boxes for write-in forms instead of using the underscore key on the keyboard. Using the underscore key to make the lines will make the lines very thin and odd, while the line tool will leave a solid line. You can also control the thickness or “weight” of the line when you use the line tool. Insert > Illustrations > Shapes > Lines.
To draw the line to be perfectly straight, hold down the shift key while dragging the line. You can also change the length of the line without dragging it. Right click on the line Format Auto Shape… > Size > Width. To change the thickness, right click the line, in the box that pops up above select Shape Outline > Weight.
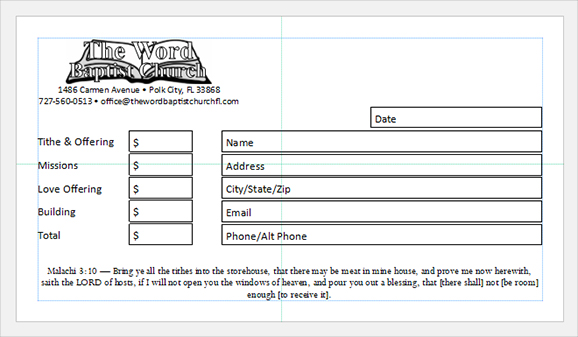
Another other option for write in forms is to use the outline of text boxes. Instead of removing the outline, you would just select the wight of the outline around the area you want people to fill in information. For this method, make sure you use a separate text box for every line.
9. Align and Distribute Text and Objects
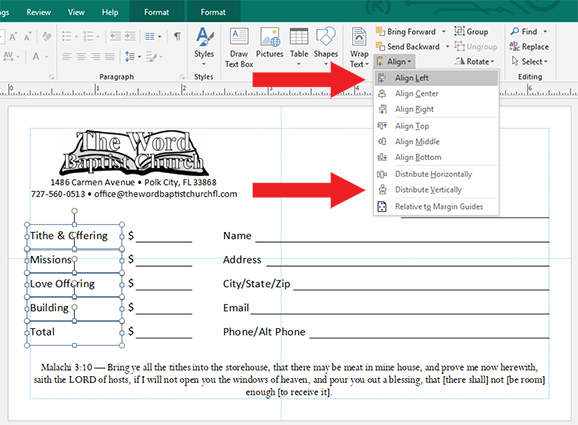
Now that you have all your content on the page it is time to get things properly aligned. To align, or evenly distribute text boxes or objects on the page, first place the first and last object where you want them to be. Hold down shift and click the objects you want to align so that they are selected. Format > Arrange > Align or Distribute. There are different options depending on what you want them to be aligned to or how you want them to be distributed.
10. Check Your Work
After you feel you are finished with your design, carefully check it over for any spelling errors, or misaligned content. It would be a terrible feeling to print a whole batch of envelopes with a missed error. Not only do you end up with a big batch of wasted offering envelopes, but the hours you spent preparing it are wasted as well. Take your time to carefully look over your work before you send it off to the printer. It is a good idea to print off a copy onto paper to see how it will look printed. Have a friend look over it as well to be sure nothing is missed.
11. Save Your Envelope Again!
At this point it is a good idea to save 2 copies, the second being saved as an envelope template. That way you always have a second copy if you accidentally save over the original, or if you want to make a similar envelope.
12. Print Your Offering Envelopes
Congratulations! You designed your own offering envelope! Now you can either print your offering envelope yourself, or submit your design to a print shop. Publisher files may not compatible with the design programs used in print shops, and may need to be converted to a PDF file first. Another option is to submit your design as a mock up, and have them recreate your envelope in another program. If you contact the print shop directly, they will let you know what their normal process is, and what file formats they can accept. Either way, you will still have the satisfaction of designing your own church offering envelope.
13. Tips
To have more control over moving your objects on the page, use the arrow keys.
To group multiple objects so they will all move together, hold down Ctrl and click the objects you want grouped, then Home > Arrange > Group.
Use the line tool or boxes to section your envelope and make your design more interesting.
Keyboard Shortcuts
- Ctrl+S = save
- Ctrl+Z = undo
- Ctrl+X = redo
- Ctrl+C = copy
- Ctrl+V= paste
- Ctrl+A= select all
- Ctrl+B = bold
- Ctrl+I = italics
- Ctrl+U=underline
- Ctrl+R=right align text
- Ctro+L=left align text
- Ctrl+E=center align text
14. Free Offering Envelope Templates
Here are a few free offering envelope templates to help get you started on designing your own offering envelopes. We also have some here from our previous offering envelope article available for download.